Early aviation models, 1903 to 1918
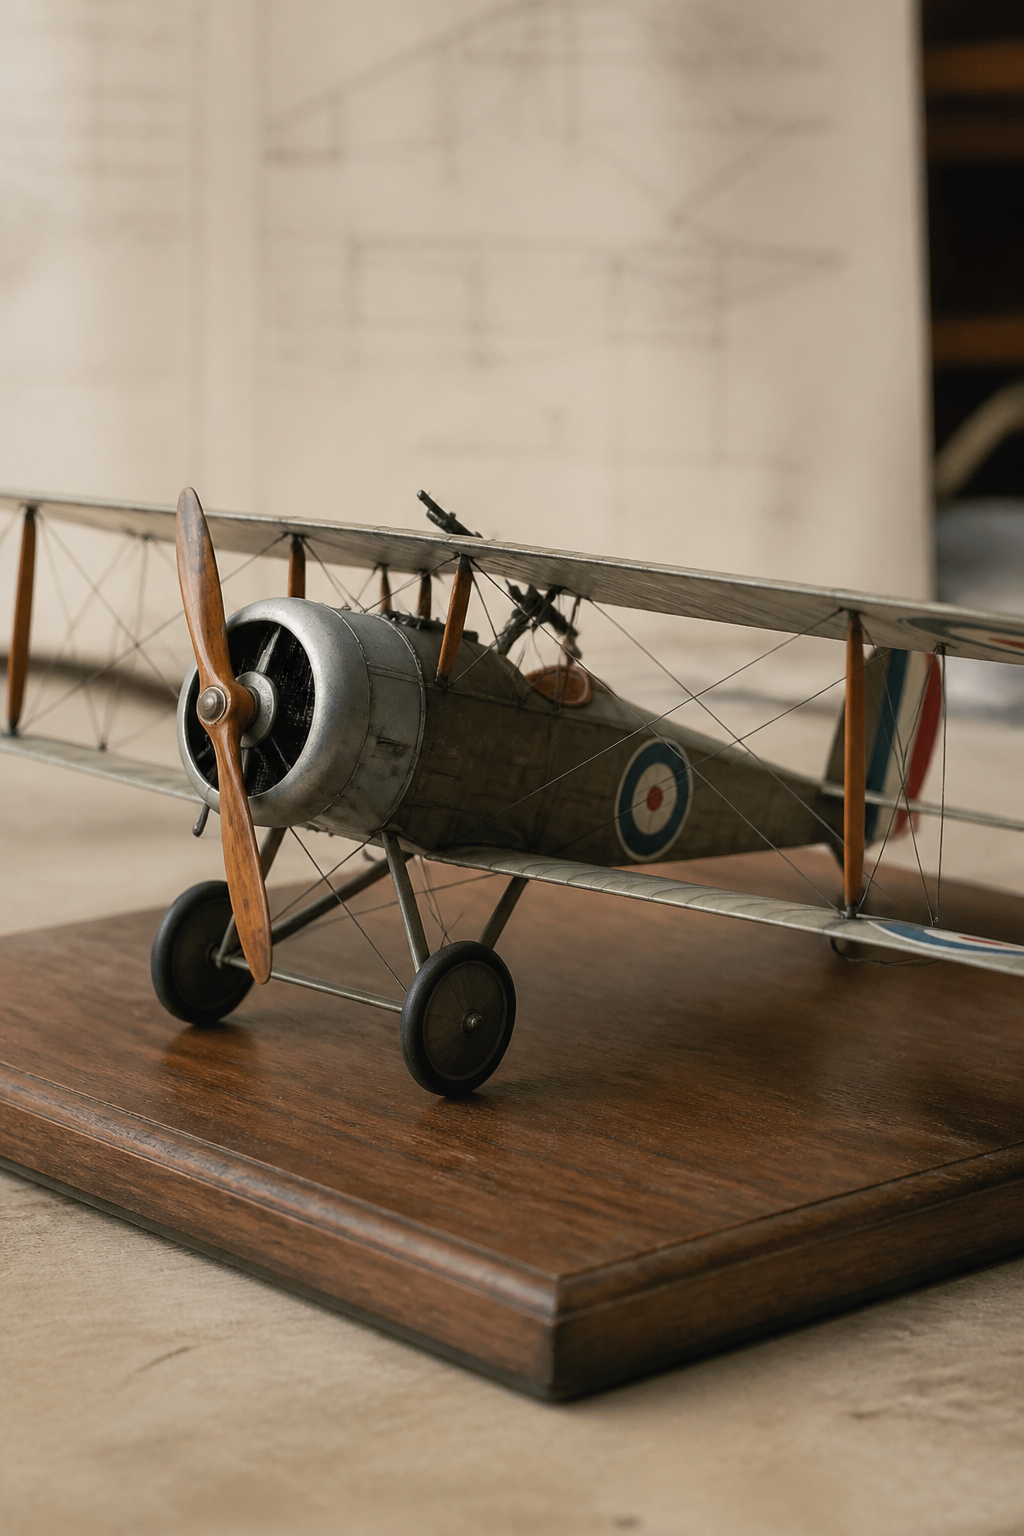
Aircraft before 1919 are mostly air, wire and doped fabric. The build is a rigging job with an airframe attached, and the sequence matters more than the skill.
- Last reviewed 20/08/2026
- Subject room
- Pioneer and First World War types
- Usual scales
- 1/72, 1/48 and 1/32
- The whole job
- Rigging
- Time split
- Airframe a third, rigging two thirds
- Main pitfall
- Dust, which cannot be brushed off a rigged model
A Sopwith Camel has fewer parts than a modern jet kit and takes twice as long. The parts are not the work. The work is a few dozen wires that all have to be straight, parallel where they should be parallel, and anchored at both ends without a blob of glue showing.
Four rigging materials, and what each one forgives
| Material | How it behaves | Good for | Weakness |
|---|---|---|---|
| Elastic monofilament | Stretches and recovers, so a knock does not break the wire | Models that will be handled or moved | Needs cyanoacrylate; too thick for 1/72 in some grades |
| Nylon monofilament | Rigid and very fine, holds a dead straight line | Fine scales, static display | Kinks permanently, and a broken wire cannot be spliced |
| Stretched sprue | Free, matches the plastic, takes paint perfectly | Practice, and matching a specific colour | Brittle; snaps at the anchor on the first handling |
| Fine metal wire | Holds its own shape, can be made to sag correctly | Large scales and visible turnbuckles | Hard to anchor invisibly at both ends |
For a first rigged model, elastic monofilament is the honest recommendation, because the failure mode of everything else is a wire that lets go six months later behind glass.
The order that saves you
- Drill every anchor hole before assembly, while the wings are flat on the bench and both faces are reachable.
- Paint and decal the wings before the top wing goes on. Nothing can be repainted afterwards.
- Rig the wires that will become unreachable first, usually the inner bay and the cabane struts.
- Anchor one end, let it cure, tension the wire by hand, then anchor the other end and cut flush.
- Fit the propeller last. It is the part most likely to be broken by your own hands during rigging.
Alignment discipline is the same as for float and strut assemblies: check from directly in front and from directly above after every joint, because those two views catch everything.
Fabric, dope and the colour of linen
Most of these aircraft were linen stretched over a wooden or steel-tube frame and painted with dope, a cellulose varnish that shrank the fabric drum tight. Clear-doped linen is not white and not cream. It is a warm, slightly translucent straw colour that darkens with sunlight and engine oil, and it shows the ribs underneath as regular pale bands.
Two national conventions are worth knowing because they change the whole model. British aircraft from 1916 were largely finished in PC10, a dark khaki-brown protective dope whose exact shade varied by batch and faded quickly in sun. German aircraft used printed camouflage fabric, commonly called lozenge, in four or five colour patterns, supplied to modellers as decal sheet. Lozenge decals must wrap over rib tapes, so a setting solution and patience are not optional.
Laminated propellers
Propellers of this era were built from glued laminations of alternating hardwoods, so the blade shows stripes that curve with the twist. A propeller painted flat brown is the single most common giveaway on an otherwise good early model. The method that works: paint the blade in the lighter wood tone, then draw the darker laminations with a fine brush following the curve, then gloss varnish. Three minutes of work that lifts the whole model.
How big these are
| Type | Span | 1/72 | 1/48 |
|---|---|---|---|
| Fokker Dr.I, upper wing | 7.19 m | 10.0 cm | 15.0 cm |
| Bleriot XI | 7.80 m | 10.8 cm | 16.3 cm |
| SPAD XIII | 8.25 m | 11.5 cm | 17.2 cm |
| Sopwith Camel | 8.53 m | 11.8 cm | 17.8 cm |
| Wright Flyer, 1903 | 12.29 m | 17.1 cm | 25.6 cm |
| Handley Page O/400 | 30.48 m | 42.3 cm | 63.5 cm |
Single-seat types are small enough that 1/48 is the practical scale for a rigged model, and 1/32 is genuinely enjoyable rather than absurd. The big bombers reverse that: an O/400 at 1/48 is nearly two thirds of a metre across.
Before you glue the top wing on
Ask yourself which wires you will not be able to reach afterwards, and rig those now. Every builder who has removed a top wing to fix one missed wire has removed a top wing exactly once.
Dust, and why these models live behind glass
A rigged model cannot be dusted. A brush catches wires, a cloth is out of the question, and canned air at close range snaps aerials and can flick a wire loose. In an ordinary room, open-shelf rigging collects visible fluff within a month, and once it is there it stays. This is the one category where a case is not a preference, and the case sizing rules should be read before the model is finished, not after.
- Standing rigging
- The fixed wires that brace the wing structure. On models, the wires that must be straight and evenly tensioned.
- Flying and landing wires
- The two opposed sets of bracing wires: flying wires take the load in the air, landing wires take it on the ground.
- Cabane struts
- The struts joining the upper wing to the fuselage, as distinct from the interplane struts further out.
- Dope
- Cellulose varnish that tightens and seals fabric covering. Clear dope leaves a translucent straw colour; pigmented dope gives the finish its shade.
- Lozenge
- Printed polygonal camouflage fabric used on German aircraft from 1917. Supplied to modellers as decal sheet.
Where to go from here
- A rigged model needs a case, not a shelf
Sizing, seals and the materials that keep dust off wires you can never clean.
- Look up the rigging vocabulary
Turnbuckles, cabane struts, deadeyes and the rest, one line each.
- Buying an older rigged model
What to check before you pay for someone else’s rigging, and what cannot be repaired.